



1.1 Overview
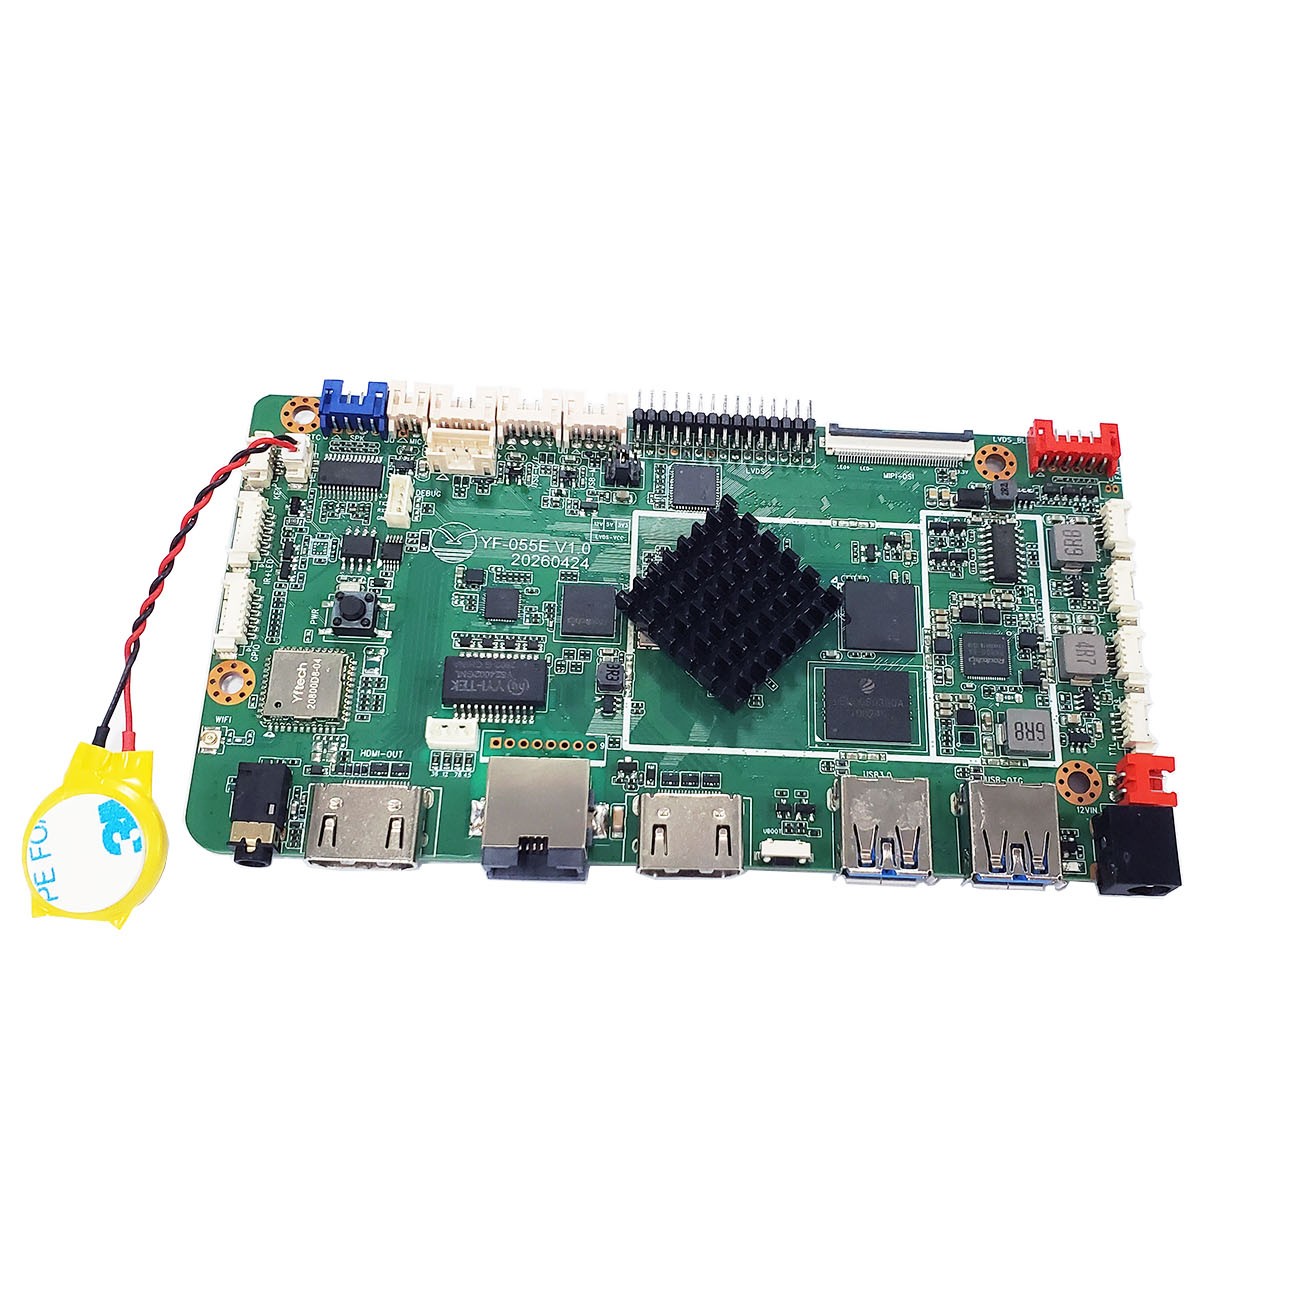
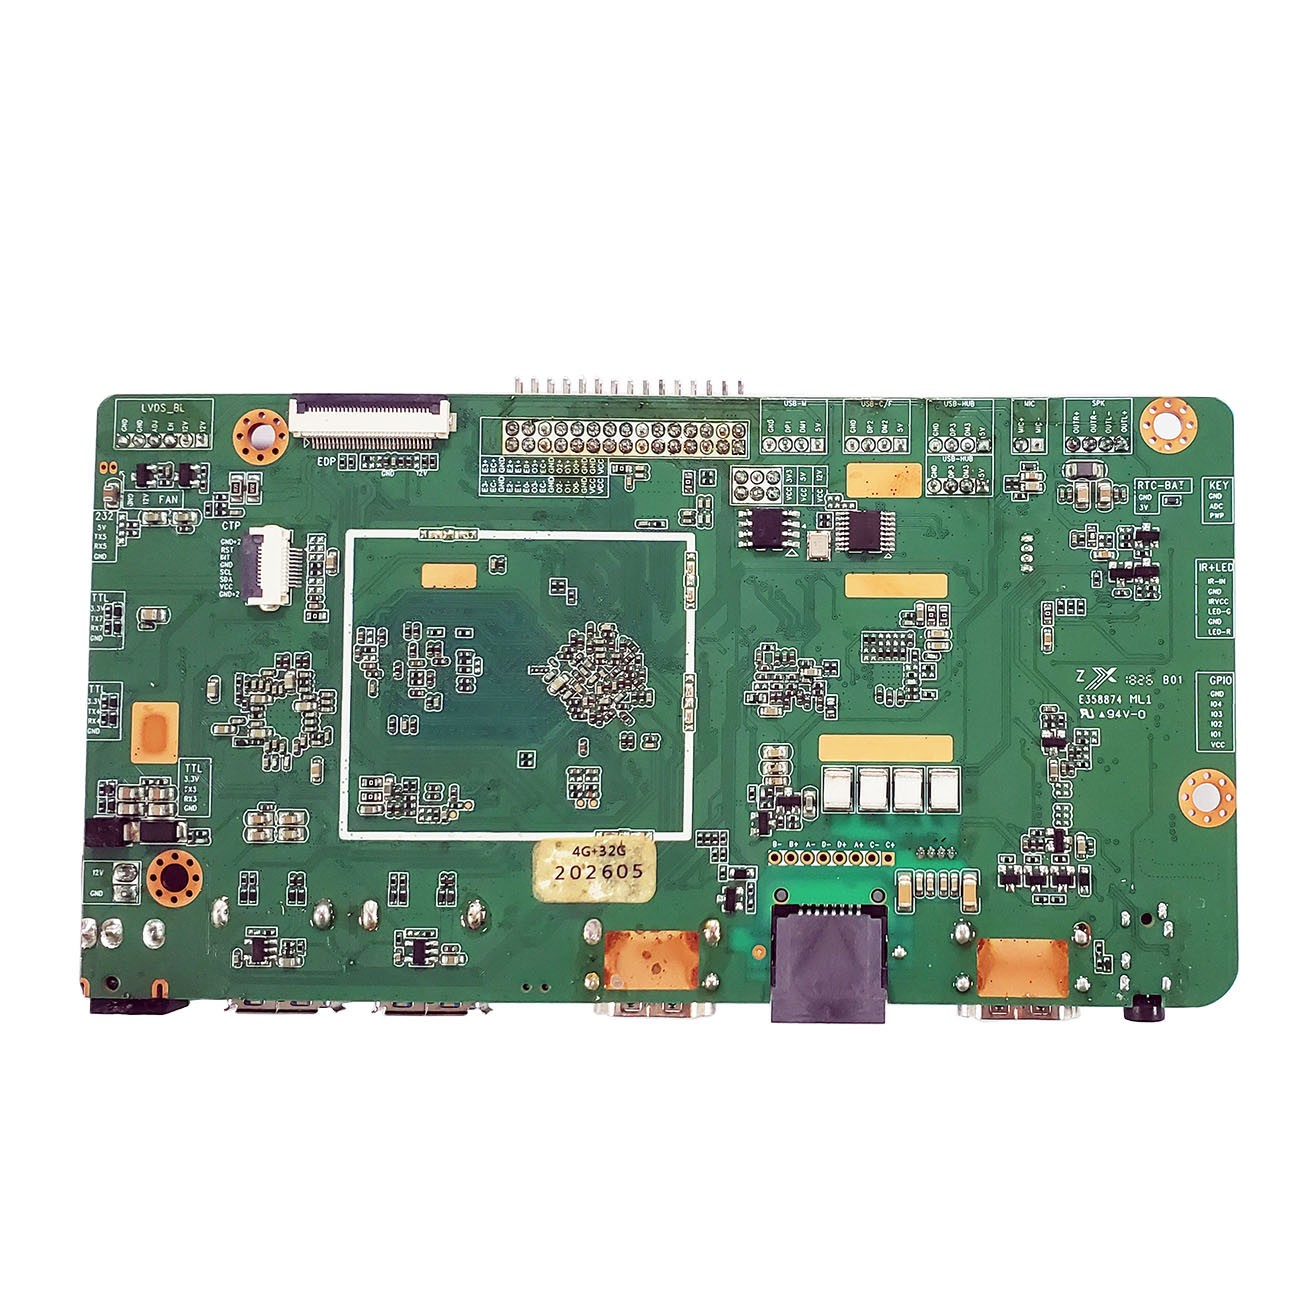
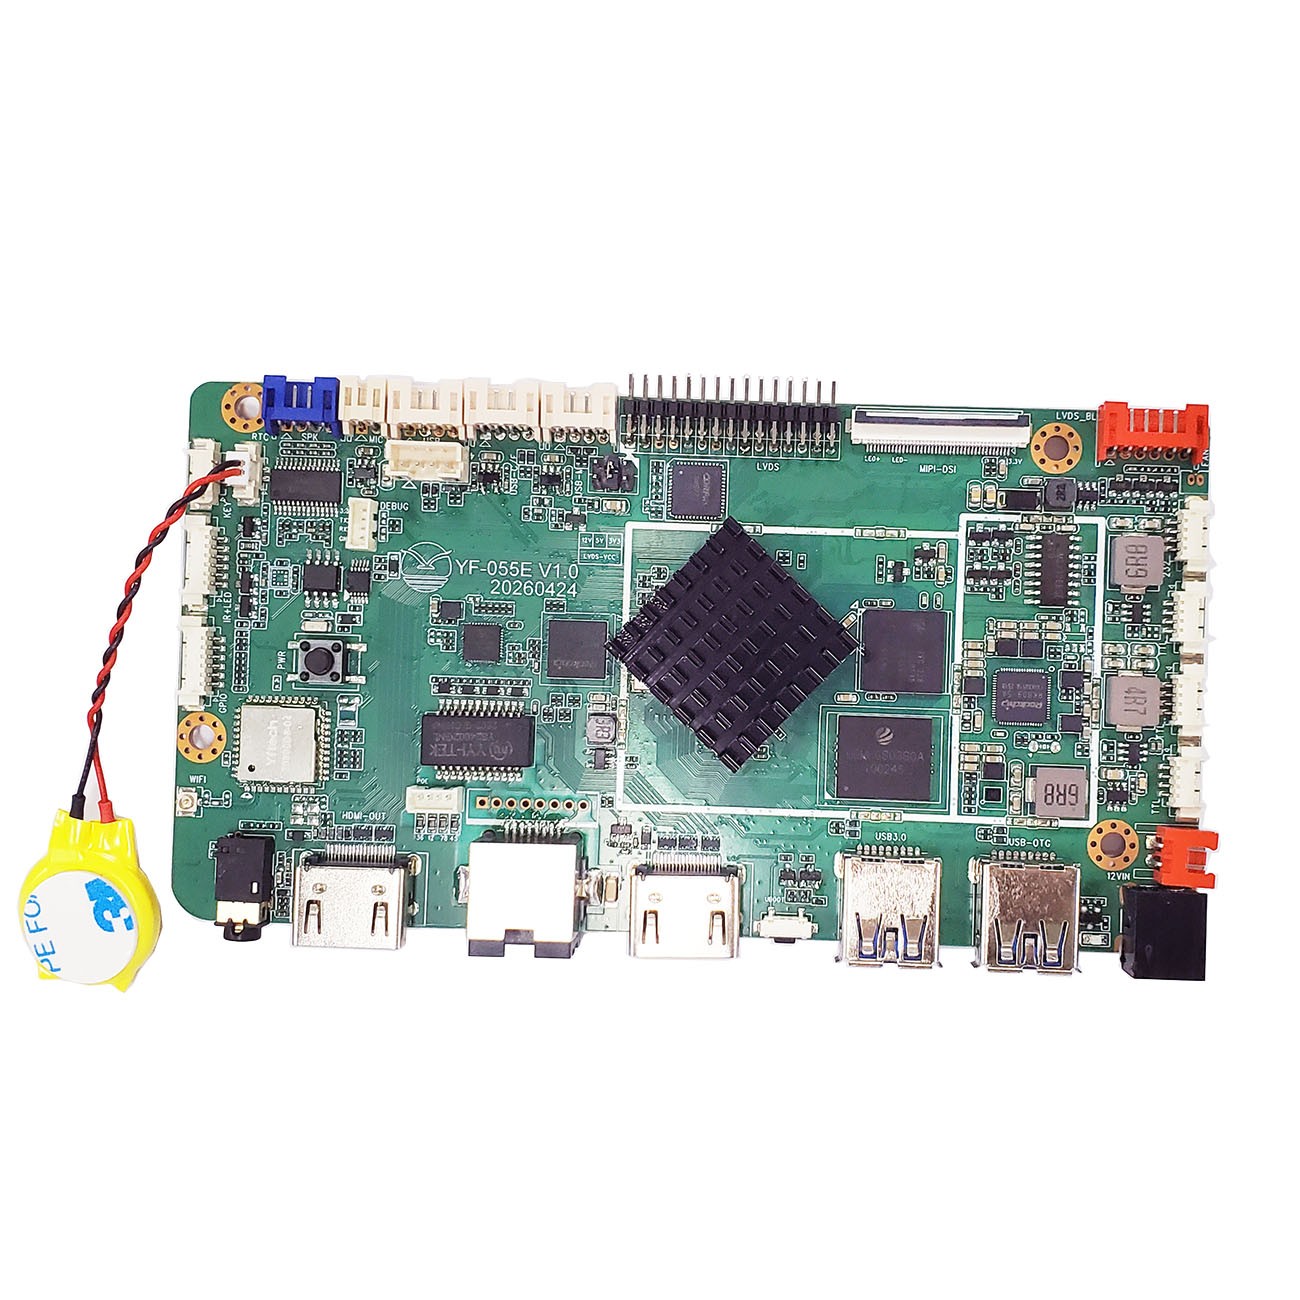
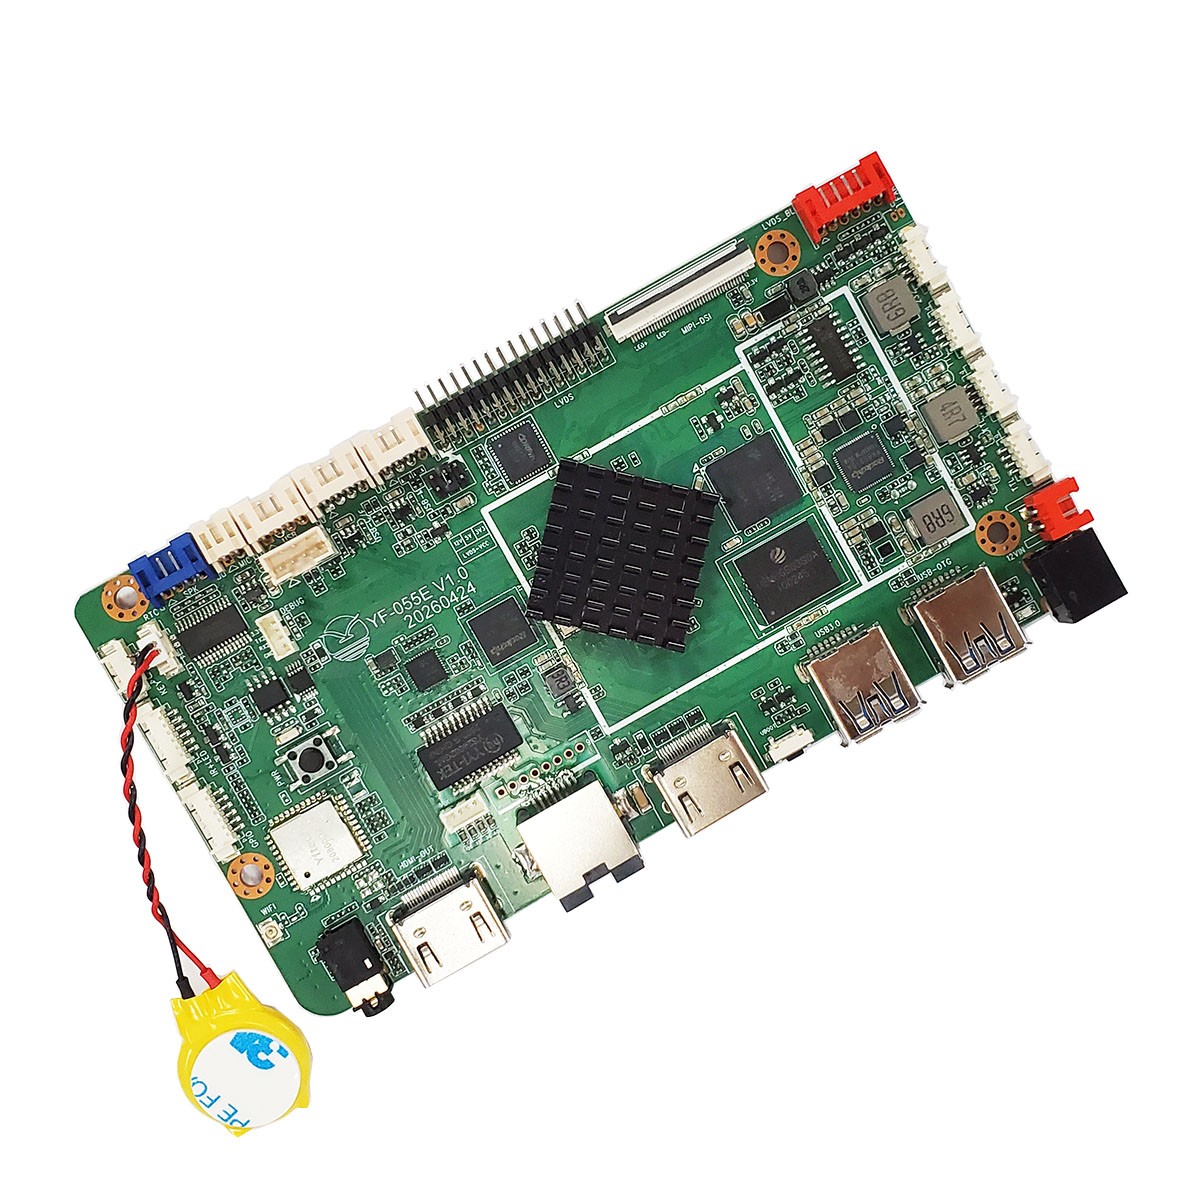
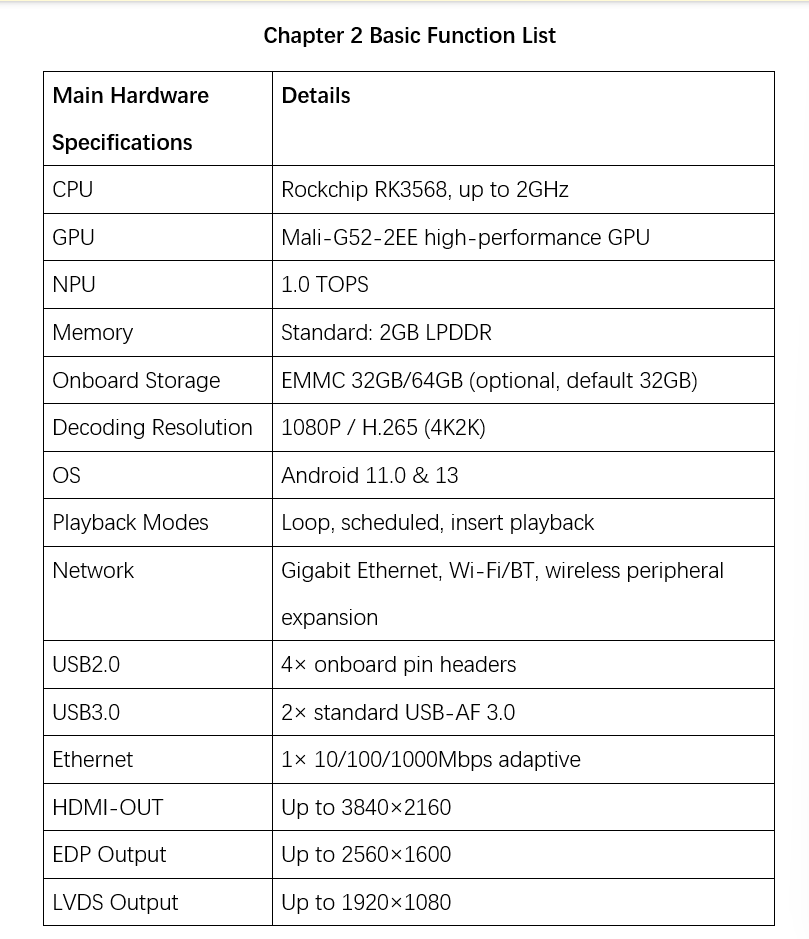
The YF-055E board adopts the Rockchip RK3568 high-performance, low-power quad-core application processor with Android 11.0 OS and a main frequency up to 2.0 GHz. The embedded 3D GPU enables full compatibility with OpenGL ES 1.1/2.0/3.2, OpenCL 2.0, and Vulkan 1.1. A dedicated 2D hardware engine maximizes display performance and ensures smooth operation.The built-in NPU supports 1.0 TOPS. It supports nearly all video formats: H.264 decoder 4K@60fps, H.265 decoder 4K@60fps, H.264/H.265 encoder 1080p@60fps, and high-quality JPEG encoder/decoder.Integrated with multi-channel LCD drivers, Ethernet, dual-band Wi-Fi/BT power amplifier, it supports decoding of most popular video and image formats. Dual LVDS/EDP/MIPI supports 2K-level output, compatible with various TFT LCD panels, simplifying overall system design.
1.2 Features
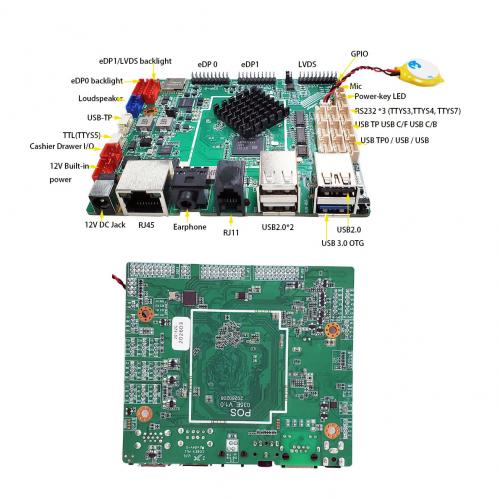
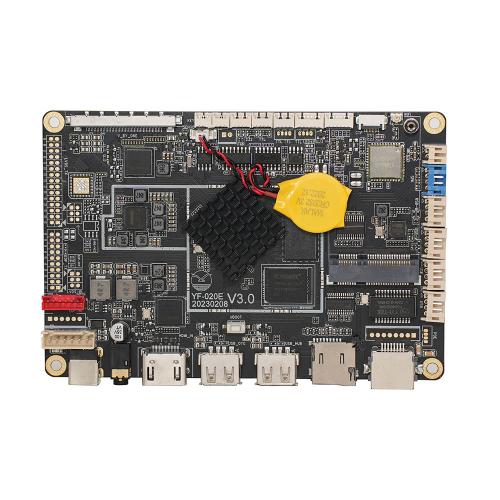
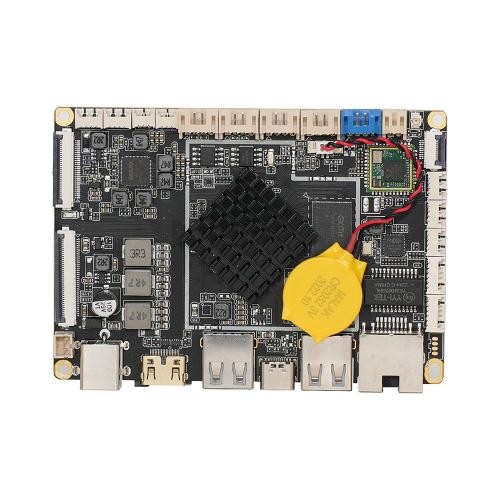
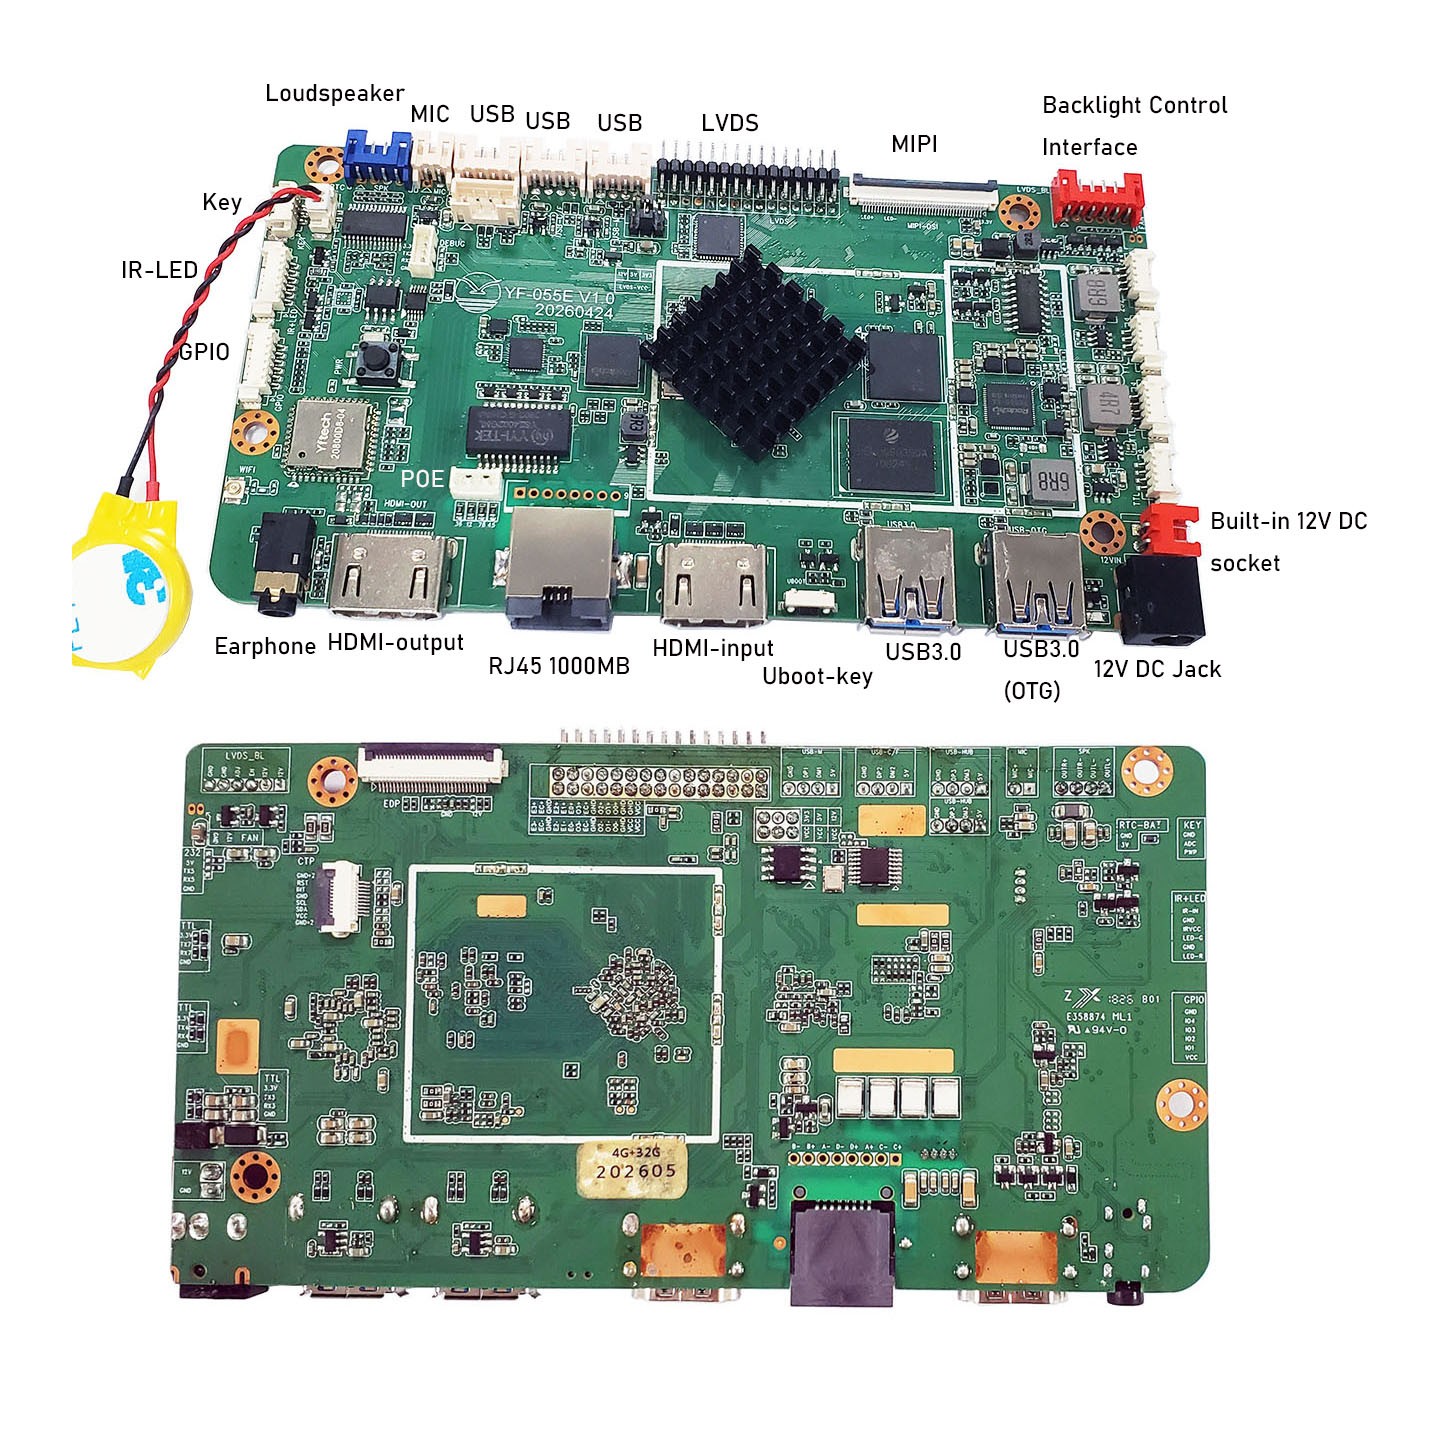
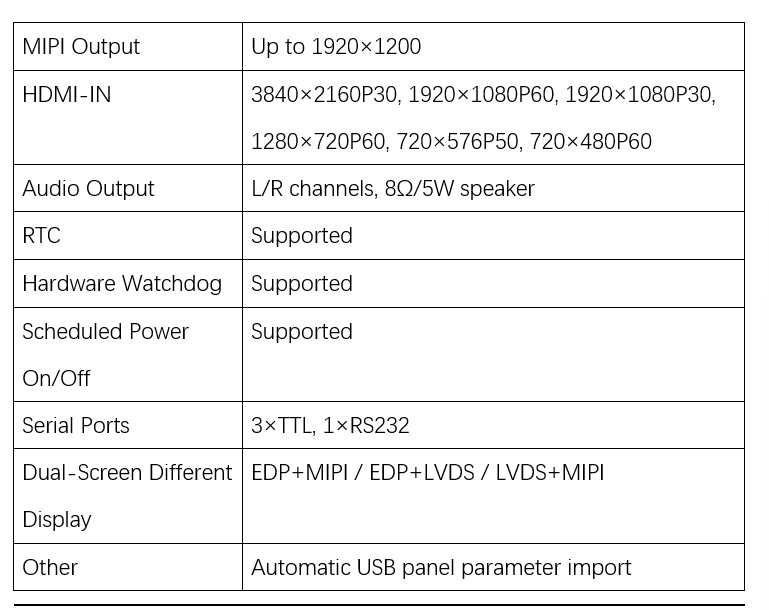
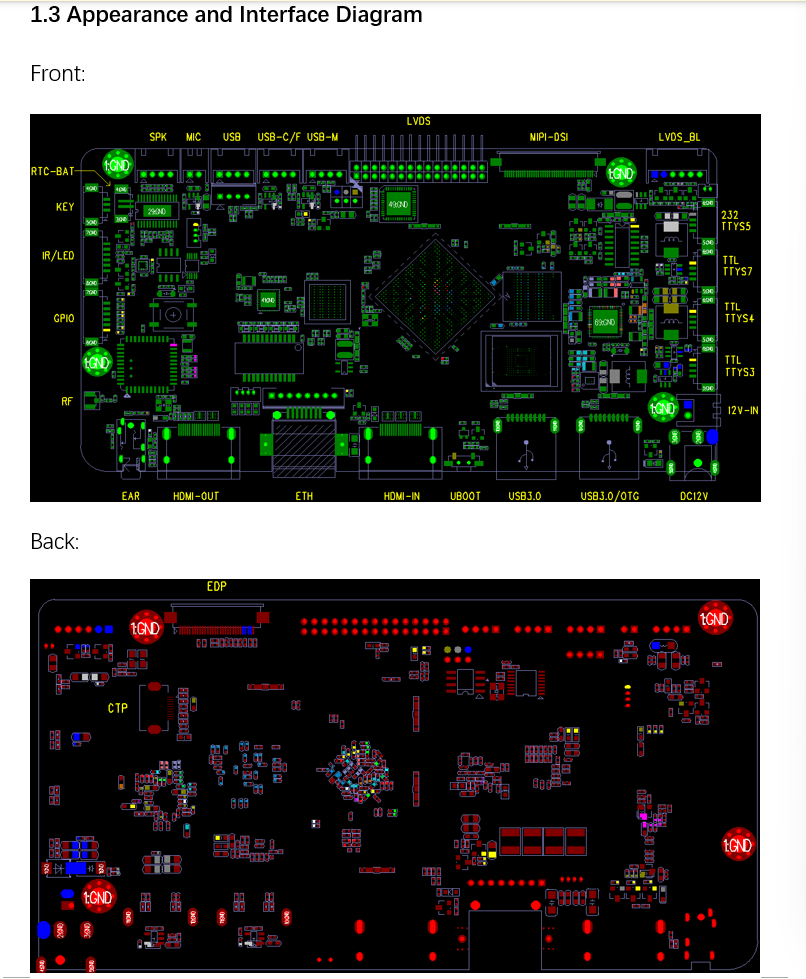
High integration: Integrates USB/LVDS/EDP/MIPI/HDMI_OUT/HDMI_IN, Gigabit Ethernet, dual-band Wi-Fi/BT, dual microphones, etc. Simplifies system design and improves aesthetics.
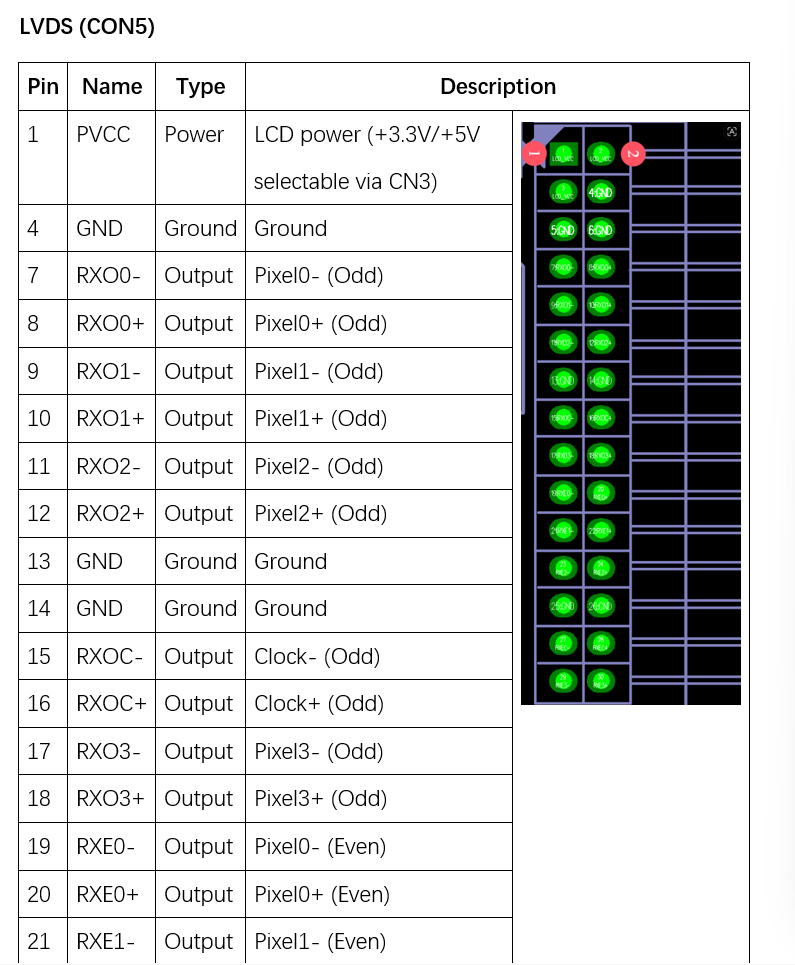
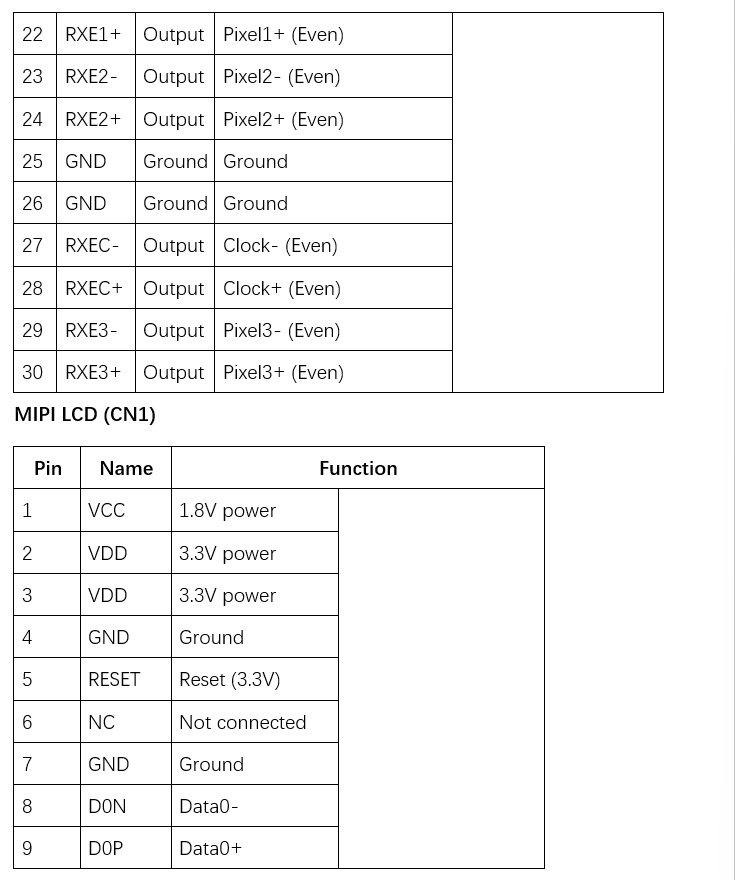
High definition: Supports 1080P/H.265 (4K2K) video decoding and LCD panels with MIPI/EDP/LVDS signals.
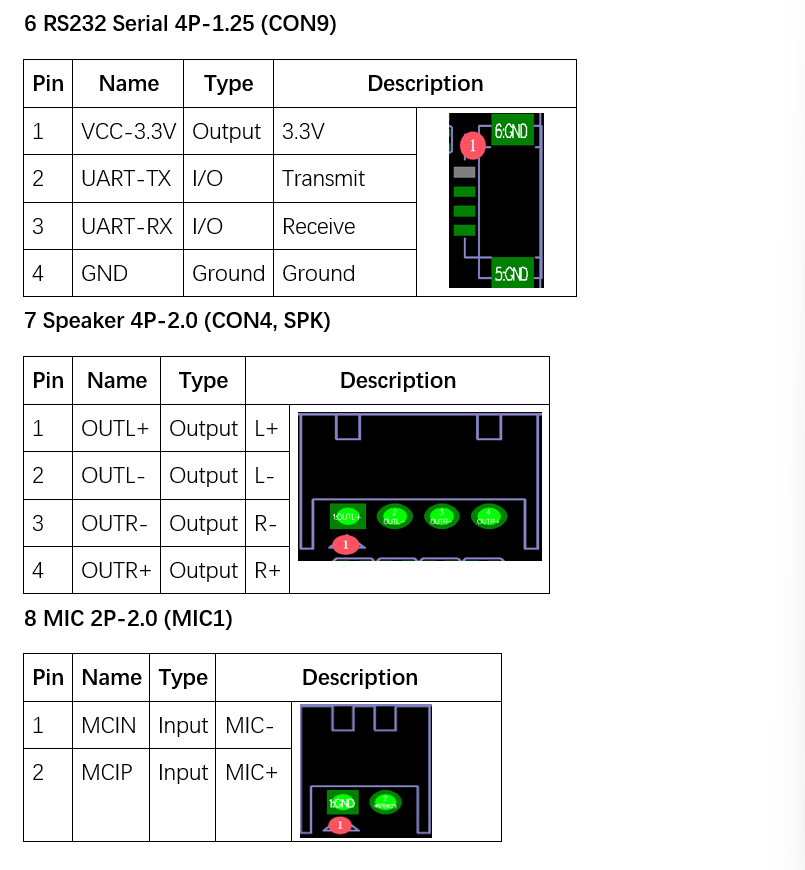
Built-in power amplifier: Supports dual-channel 8Ω/5W amplifier.
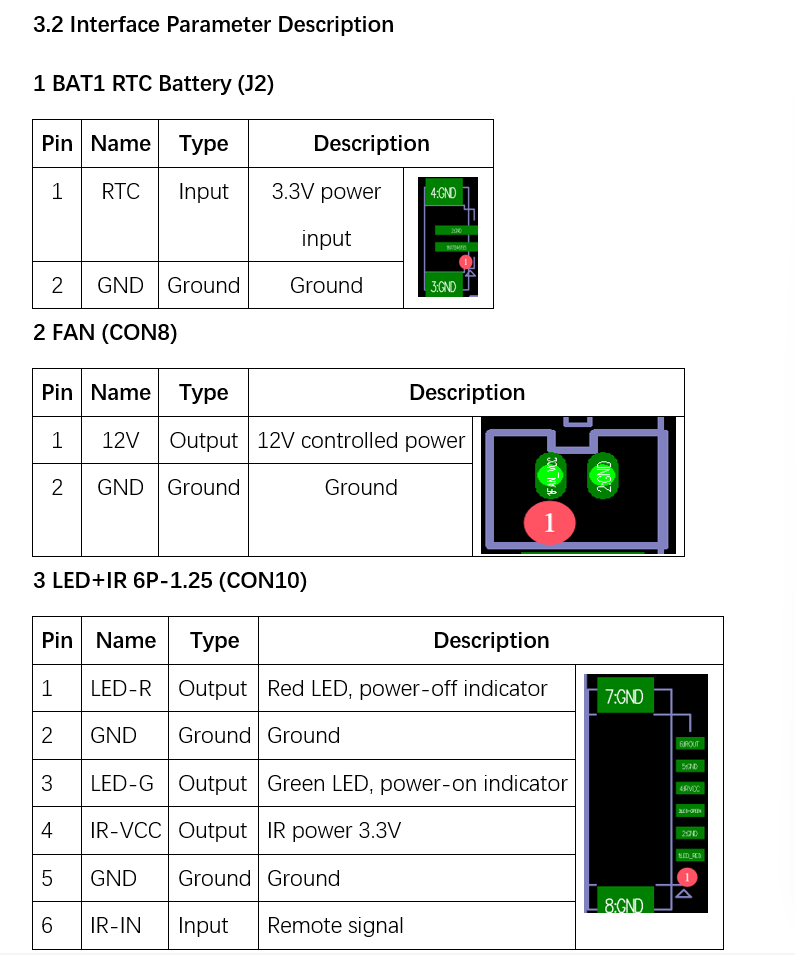
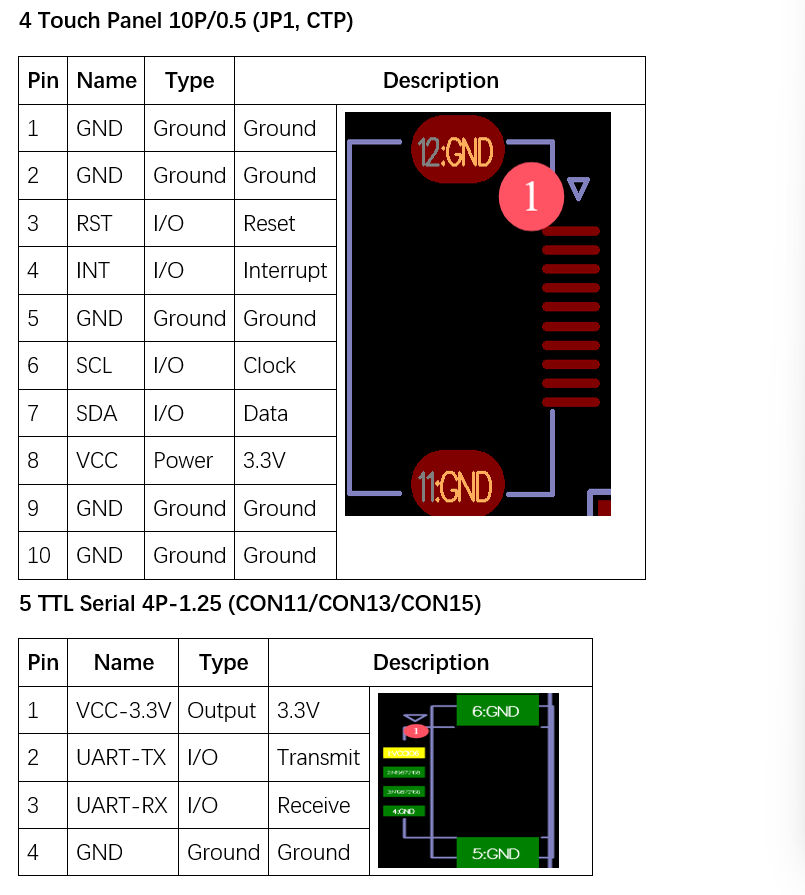
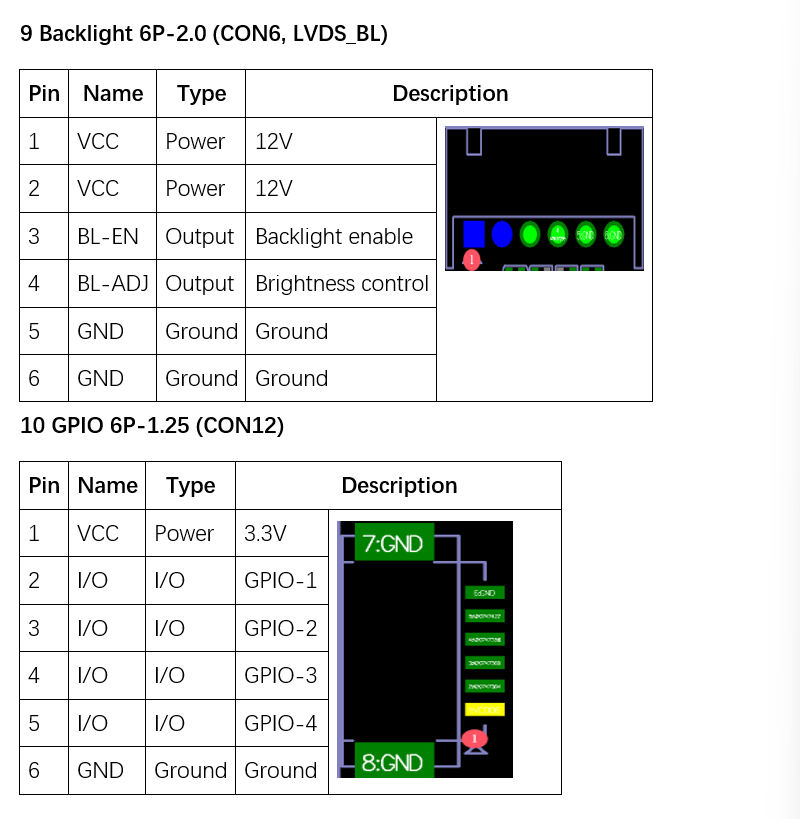
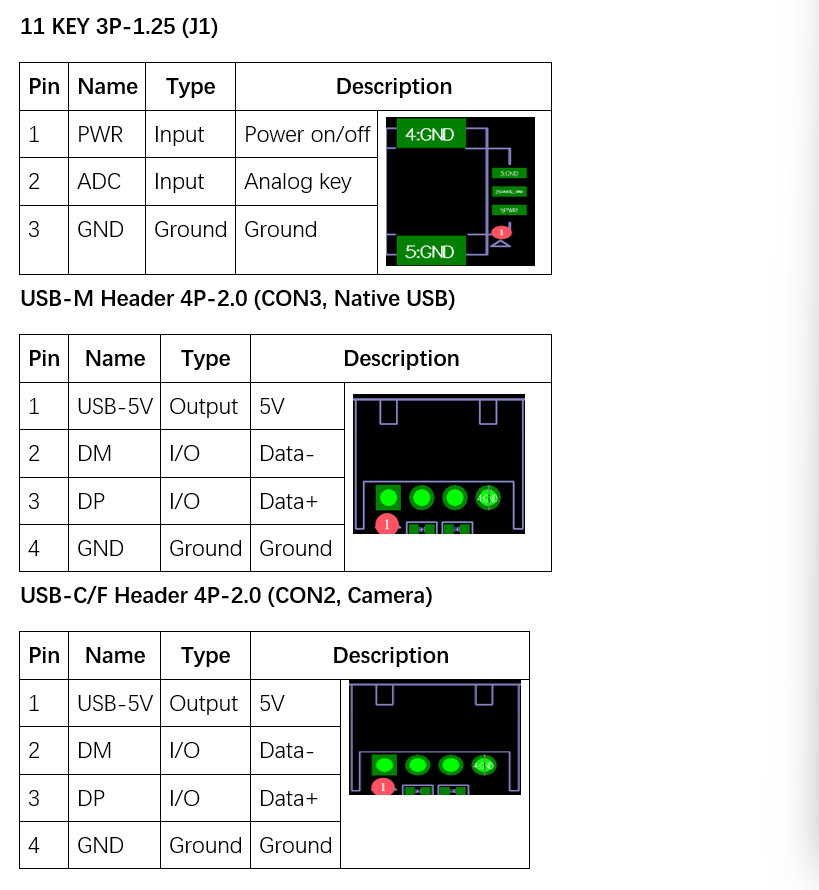
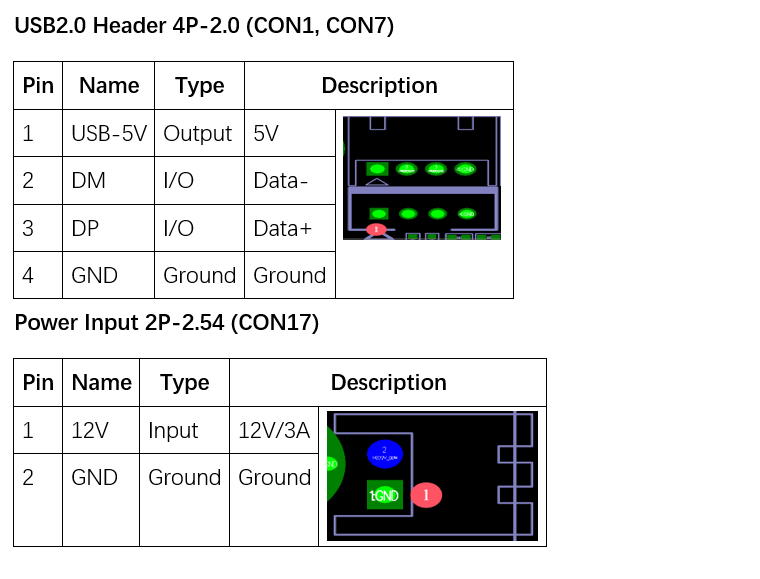
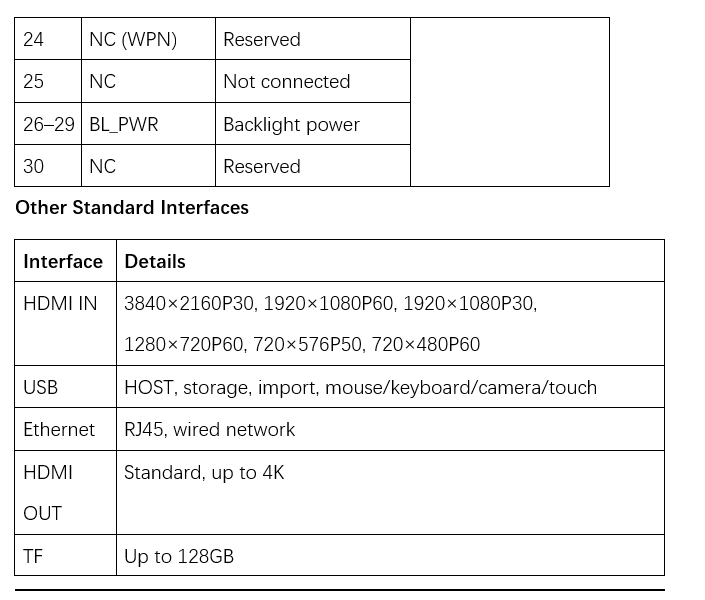
Rich interfaces: 2×USB3.0, 4×USB2.0, 3×TTL, 1×RS232, GPIO, ADC expansion. Compatible with mainstream peripherals.
Full functionality: Portrait/landscape playback, video split-screen, scrolling subtitles, scheduled on/off, USB data import.
Easy management: User-friendly playlist software for ad management; playback logs for status tracking.
Application scenarios: Smart commercial displays, smart terminals with HDMI IN.
Chapter 5 Assembly and Usage Notes
During assembly and use, pay attention to the following (but not limited to):
1. Short‑circuit risk between bare board and peripherals.
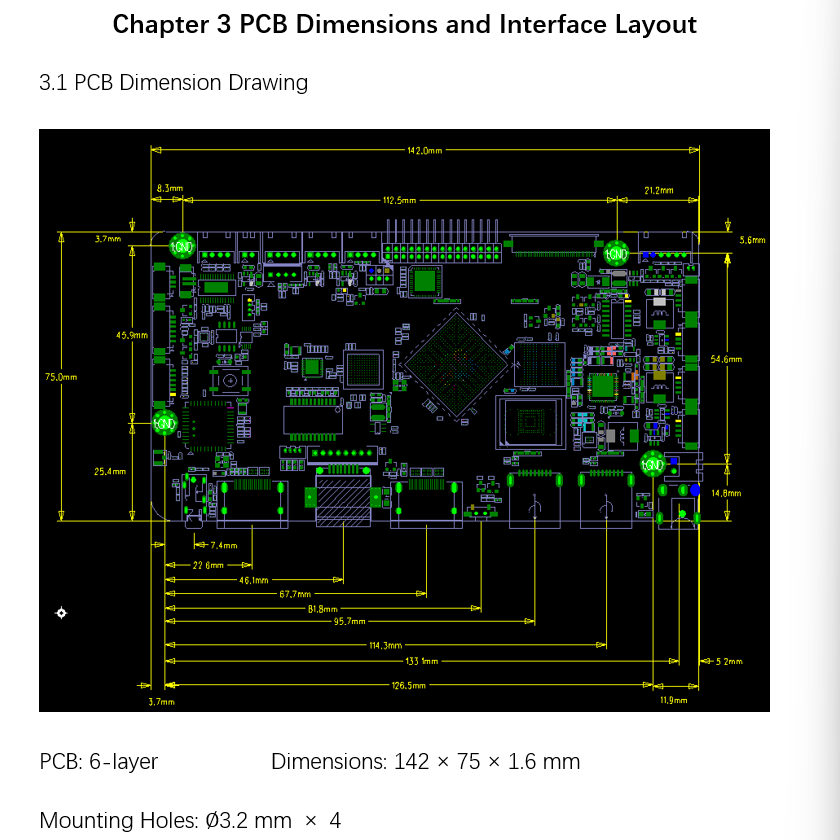
2. Avoid PCB deformation during installation/fixing.
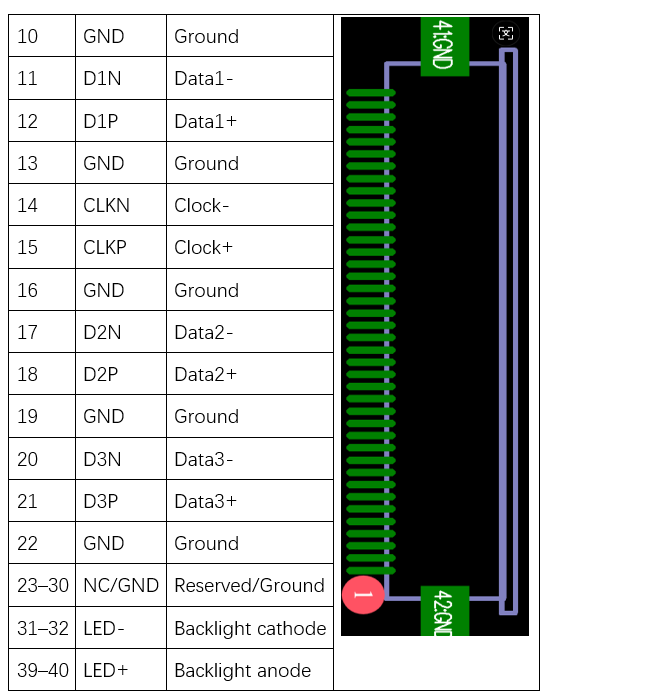
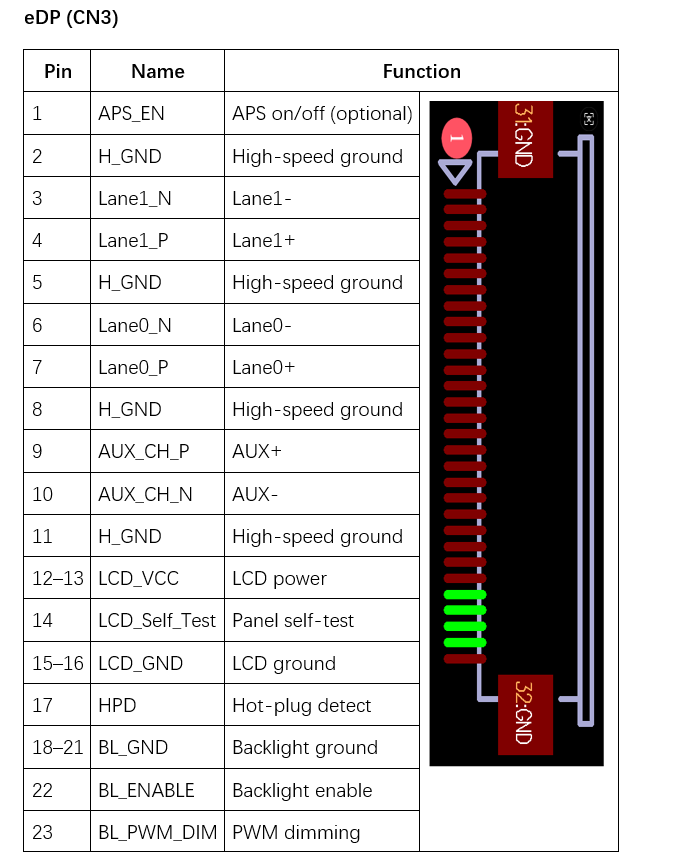
3. When installing EDP/LVDS panels, verify voltage/current and pin 1 orientation.
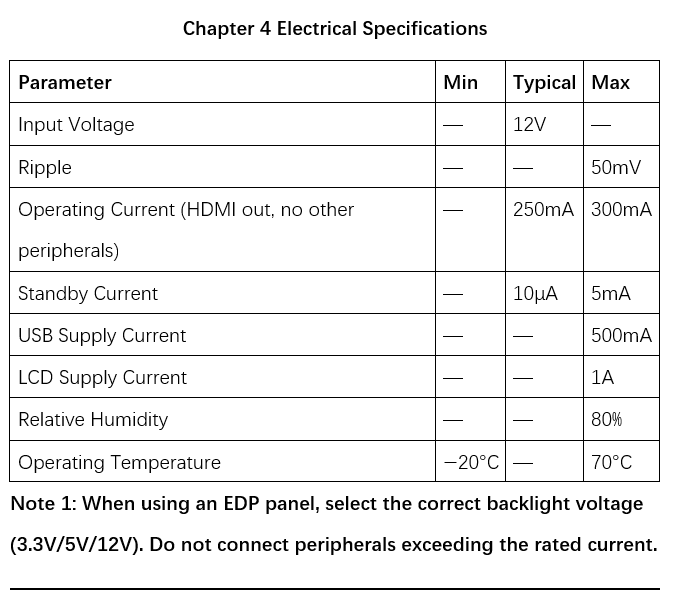
4. Check backlight voltage/current; if backlight power >20W, use an external power supply.
5. Verify peripheral I/O levels and current ratings.
6. For serial ports, confirm TX/RX wiring if connecting to RS232/485 devices.
7. Connect power to the dedicated input connector only. Do not power via backlight header.
We chat